Are you interested in setting up a Facebook page for your business? Not sure where to start? Maybe you’ve thought about it but didn’t get past choosing a category or creating a cover photo. If you’re considering setting up a Facebook page, or have started the process but never finished, this article is for you. In this article you’ll discover how to set up a Facebook page for your business and beyond. Thanks to Kristi Hines for creating this article.
#1: Choose a Page Category
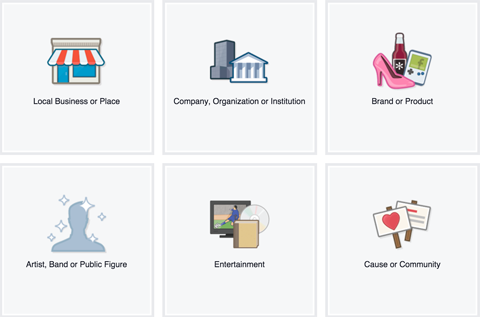
When you set up your Facebook page, you enter the name of your page and choose from six main page categories (which all have their own subcategories).
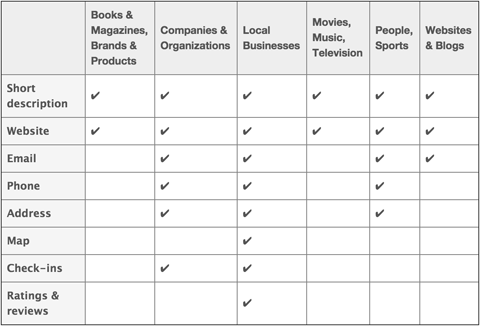
The category you choose allows you to have specific features, as shown in this helpful chart from Facebook’s Help Center.
Beyond the features you want to have on your page, following is additional information to help you choose the right type of Facebook page. Make sure you choose both the category and subcategory that are most relevant for your page.
Note that you can change your page’s category an unlimited number of times. The only consequence is if you change it from the Local Business or Place category, you’ll lose your reviews, map and check-ins.
Local Business or Place
Choose the Local Business or Place category if you have a physical address where your customers do business with you or that represents the physical area in which you offer your services. This is also a good option if you want to allow people to check in at your location or review your business on Facebook.
Company, Organization or Institution
Choose the Company, Organization or Institution category if your page represents an entity that is not location-dependent, such as Dell, NASA or the University of Phoenix. This category is also a good option for local businesses or places that want to list an address and allow check-ins, but don’t want customers to leave reviews.
Brand or Product
Choose Brand or Product if your page represents something that is sold through a variety of retailers. It’s a good option if you don’t need to designate a physical address.
Artist, Band or Public Figure
Choose Artist, Band or Public Figure if your page represents an individual such as a politician or a celebrity (real or fictional). This is also a good option if you want to market yourself separately from your Facebook personal profile.
Entertainment
Choose Entertainment if your page is related to books, magazines, movies, music or sports, but not individuals. It’s also a good option if you don’t need to designate a physical address with your page.
Cause or Community
If your page doesn’t fit under any of the above main categories (and subcategories), then choose Cause or Community as your page’s main category. However, look through the above options first to make sure that your page doesn’t fit better under a different category.
Still a little confused by page categories? Here’s an example of how a recognized name uses them. Microsoft has their main Facebook page in the Company, Organization or Institution category. They have pages for their individual Microsoft store locations in the Local Business or Place category. They also have pages for items such as the Microsoft Lumia in the Brand or Product category.
#2: Add Company Details
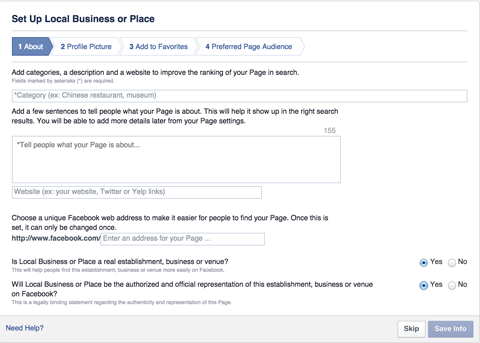
If you’re setting up a Facebook page for the first time, you’ll be taken through a wizard to fill in your information.
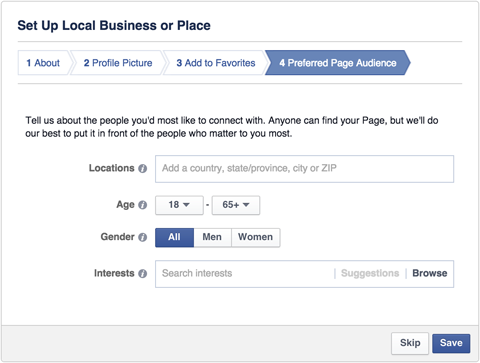
If you selected the Local Business or Place category for your page, you can add detailed category information, a description, a website and a custom web address for your page. You also have to confirm that it’s a real establishment and that you’re authorized to create a page for it.
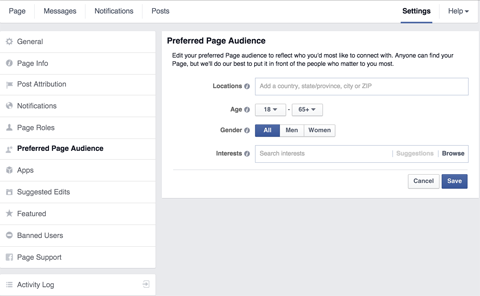
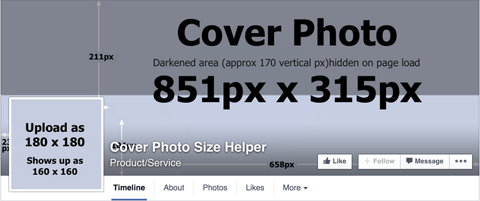
After you’ve entered these details, you’re prompted to upload your profile photo (180 x 180 pixels) and add the new page to your favorites so you can access it from your left sidebar when logged in. Also you need to specify your preferred page audience so Facebook knows who should see your page.
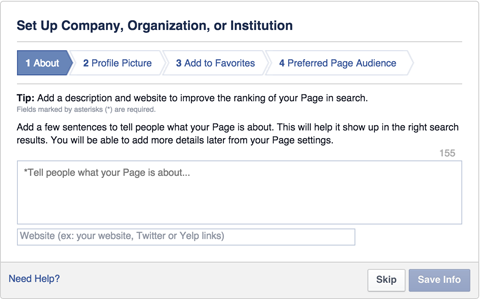
The wizard for pages in other Facebook categories is similar. For example, pages set up as Company, Organization or Institution are asked only for a description and website link. The same applies for pages in the Brand or Product; Artist, Band or Public Figure; Entertainment; and Cause or Community categories.
From here, the wizard asks you to upload your profile photo, add the page to your favorites and configure your preferred audience.
#3: Edit Page Settings
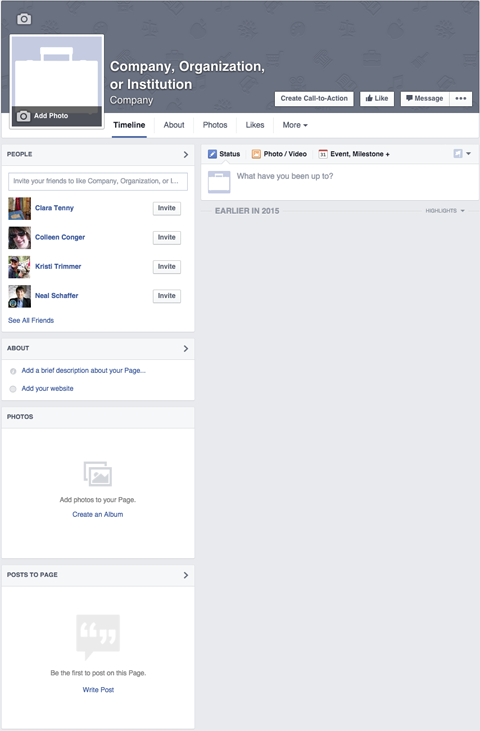
After you’ve completed the wizard, you’re taken to your Facebook page. Aside from any information you provided in the wizard, your page will be an empty shell that looks like this:
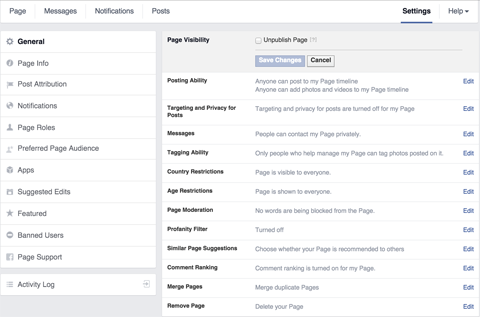
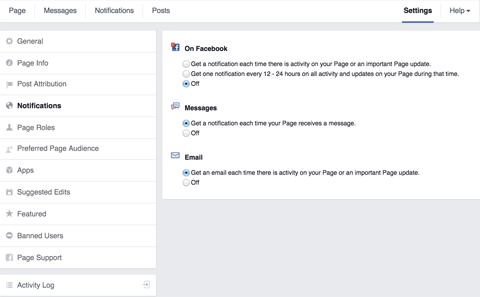
Your page at this stage is automatically published and discoverable on Facebook. If you want to keep it private until it’s completed, go to your Page Settings (in the top right of your page) and change the Page Visibility option to unpublished.
This setting is helpful if you need a couple of days to set up your page or if you need to get corporate or legal approval before publishing page content.
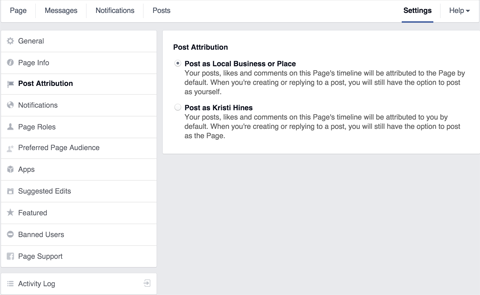
You may also want to change additional settings for your page. For example, when you post to your page, you can choose to post as your page or as your personal profile. These options are available under Post Attribution.
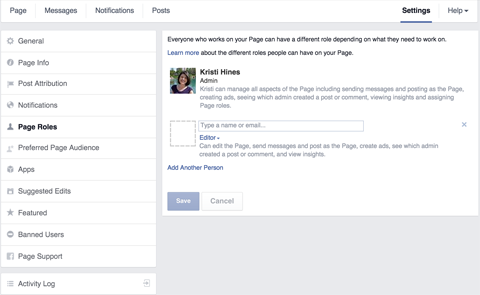
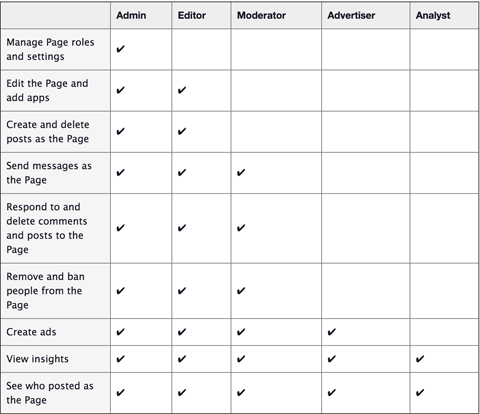
To protect your Facebook page, don’t give anyone but yourself the role of admin. Admins have full control of your page, including the option to remove you as an admin, add other admins and delete the page altogether. You can see full details about what each page role can do in the chart below from Facebook’s Help Center.
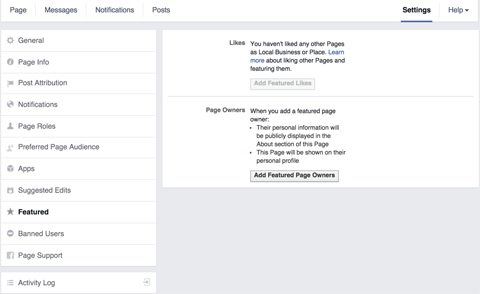
For example, if you have a local business page that falls under the umbrella of a larger company or organization, you can use Facebook as your page to like the main company or organization page. You can then set it as a featured like.
Featured likes are displayed at the bottom of the left sidebar of your page. Featured owners are shown on the About tab of your page.
#4: Create a Cover Photo
When you return to your page, you’ll notice that it’s mostly empty. The first thing you want to add is your cover photo. The cover photo is an 851 pixel wide by 315 pixel tall image that appears at the top of your Facebook page.
It should visually represent the person, place or thing for which your page was created. To get some inspiration, take a few minutes to visit your competitors’ Facebook pages to see what images they use for their cover photos.
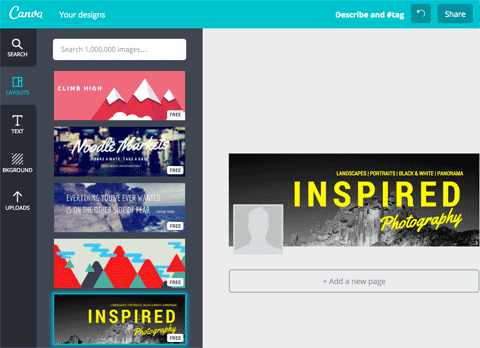
If you want to create a custom Facebook cover photo quickly but don’t have graphic design experience, try tools like Pagemodo or Canva that have a selection of Facebook cover photo templates from which to choose.
Another option is to outsource the design of your Facebook cover photo. You can choose from inexpensive services like Fiverr, crowdsourcing sites like 99designs and professional designers like Social Identities.
#5: Update Your About Information
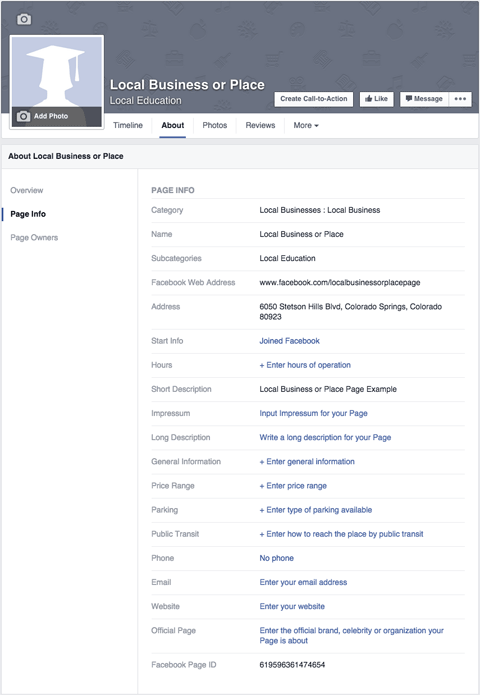
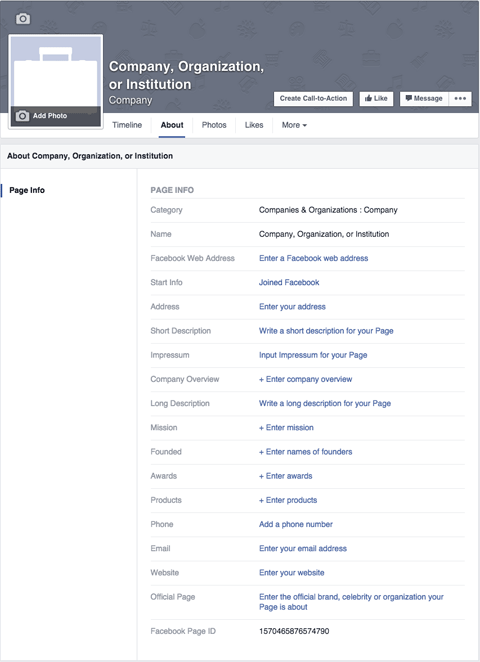
Next, update your page’s information under the About tab. Depending on the category you chose for your page, you will have specific information to fill out. For example, here’s the information you can add for a Local Business or Place page.
The specific information you’re asked to provide on the About tab will vary based on the subcategories you chose for your page. This is why it’s important that you’ve chosen both the category and subcategory that are most relevant for your page.
Make sure that at least the Facebook Web Address, Short Description and Website fields are filled out.
The Facebook Web Address gives you your unique Facebook page URL (facebook.com/
#6: Add a Call-to-Action Button
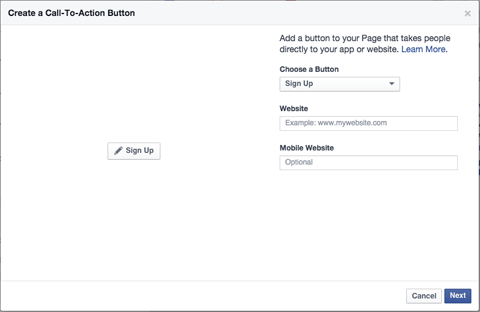
Next to your page’s Like button is a Call-to-Action button. You can customize this button with Book Now, Contact Us, Use App, Play Game, Shop Now, Sign Up or Watch Video. Each of these actions can be linked to a specific URL where the action can be completed.
You can even configure a separate link specifically for mobile users.
#7: Post Some Updates
Before you get ready to promote your Facebook page, you’ll want to post some updates to it so that people who visit your page will know what it’s about. Since Facebook allows you to post text, link, photo and video updates, start with one of each type if possible.
If you’re not sure what types of updates to post, your best bet is to visit some of your competitors’ pages to see what types of posts they make. There’s a good chance you’ll get some inspiration for your first few posts straightaway.
At this stage, if you set the Page Visibility option to unpublished, you should get the approval needed to change it back to published.
#8: Get Facebook Page Inspiration
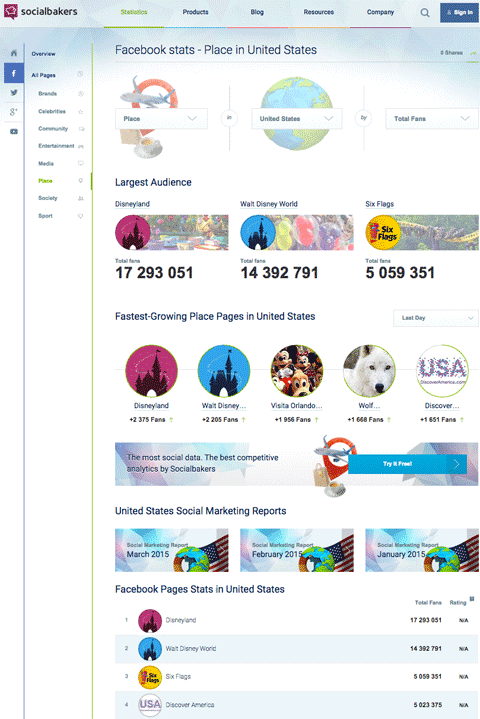
If you need inspiration for your Facebook page beyond what your competitors have to offer, take a look at the top Facebook pages in specific categories, subcategories and locations on Socialbakers.
Because these are the most popular pages, you can look to them for inspiration on cover photo design, profile photo selection, descriptions and post types.
Conclusion
Hopefully this article has helped you through the basics of setting up your Facebook page.
What do you think? Do you have questions about setting up your page? Please let us know in the comments below, and we’ll do our best to help!
This article was originally
published by Kristi Hines on
SocialMediaExaminer.com
This content is syndicated news that can be used for your research, and we hope that it can help your productivity. This content is for educational purposes and is not made for any kind of commercial purposes of this blog.

